Overview
Train signaling, oh boy this is a very broad topic that can easily branch out into different topics that can be a distraction. We'll try here to just focus on the simple facts to help explain how things work.
The use of signals is two fold:
- Define the direction a train is allowed to travel
- Tracks can be one or two way
- If a train can see the signal, it will be able to travel in that direction to it's destination
- To break the track up into block sections
- This allows a train to enter a block section knowing it will not crash into another train or cause a traffic jam
- Without train signalling, trains would simply crash into each other
A train will calculate it's route in advance when it leaves from one stop in the route to another. If it cannot find a path to the destination then the train will halt with an I'm Lost state. This means:
- All the signals that define the direction of travel need to be in place between the stops
- If a train can “see the signal”
- All the signals required to make it to the next stop
While all of this sounds complicated, don't worry as the game has a wonderful visual overlay that appears when you enter signal mode and makes it very easy to visually understand what is happening.
Semaphore vs Signal
There are two types of signals available to use in the game, semaphore and signal.
There is no functional difference between the two, either type provides the same signal mechanics. What might be confusing is why semaphore is shown on the right hand side of the signal selection list.
All future use of the term “signal” can be either semaphore or signal. When talking about lights, this is the same as the swinging arms. | 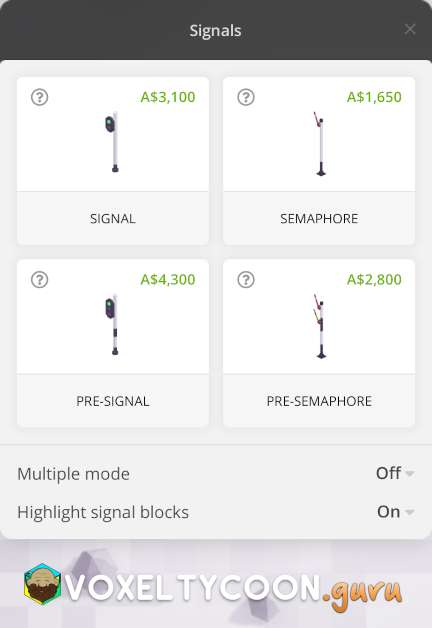 |
Block
- A block is all the rail track that exists within the signals and only one train is allowed in a block at the same time
- Here is an example:
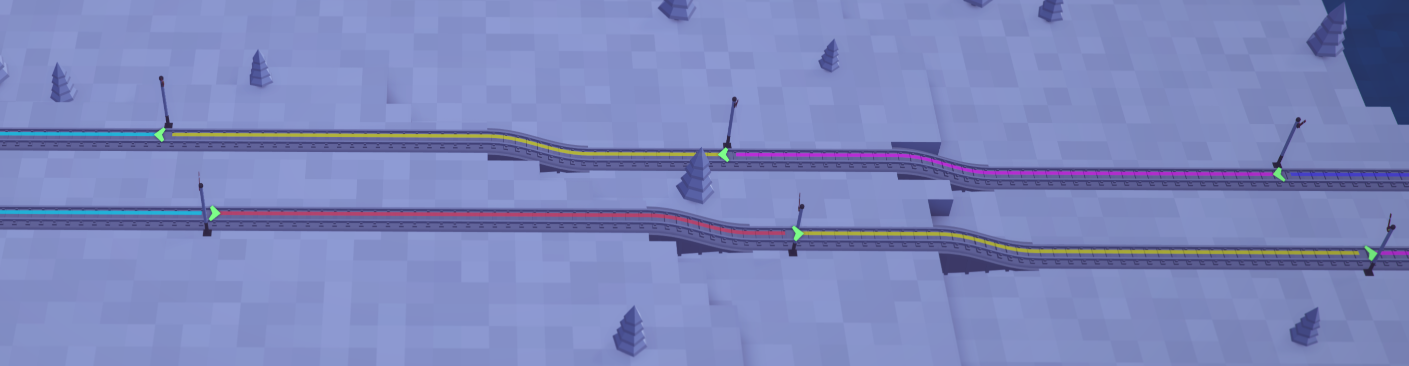
- You can see above that each block appears as a different colour and the arrows show the directions
- The colours and arrows only appear when you are in the signal building mode
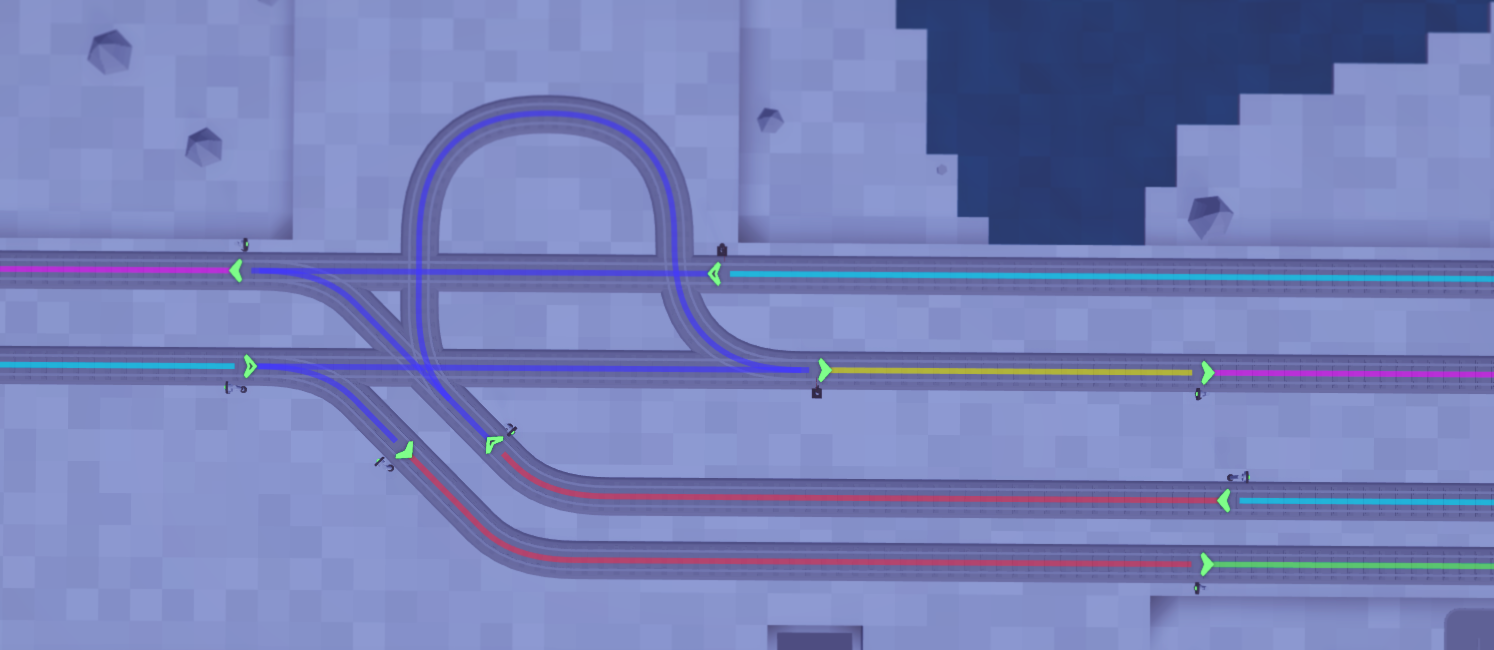
- A more advanced example is below, you can see here two tracks directions exist and the tracks are crossing over in several places, however a clearly defined block ensures only one train enters that block at one time
- A combination of signals and pre-signals are required to make this work
Signal vs Pre-Signal
A signal looks at the next block ahead and checks that it is clear, if there are no trains in that block and it is clear, it will allow a train to pass into that block.
A pre-signal performs additional block checks before allowing a train to pass through. it will look ahead at the next block(s) and make sure they are also clear.
Visually, the distinction between a signal and pre-signal is as follows:
- Additional black markings on the pole
- More lights / mechanical arms
- In highlight mode the arrow is hollow
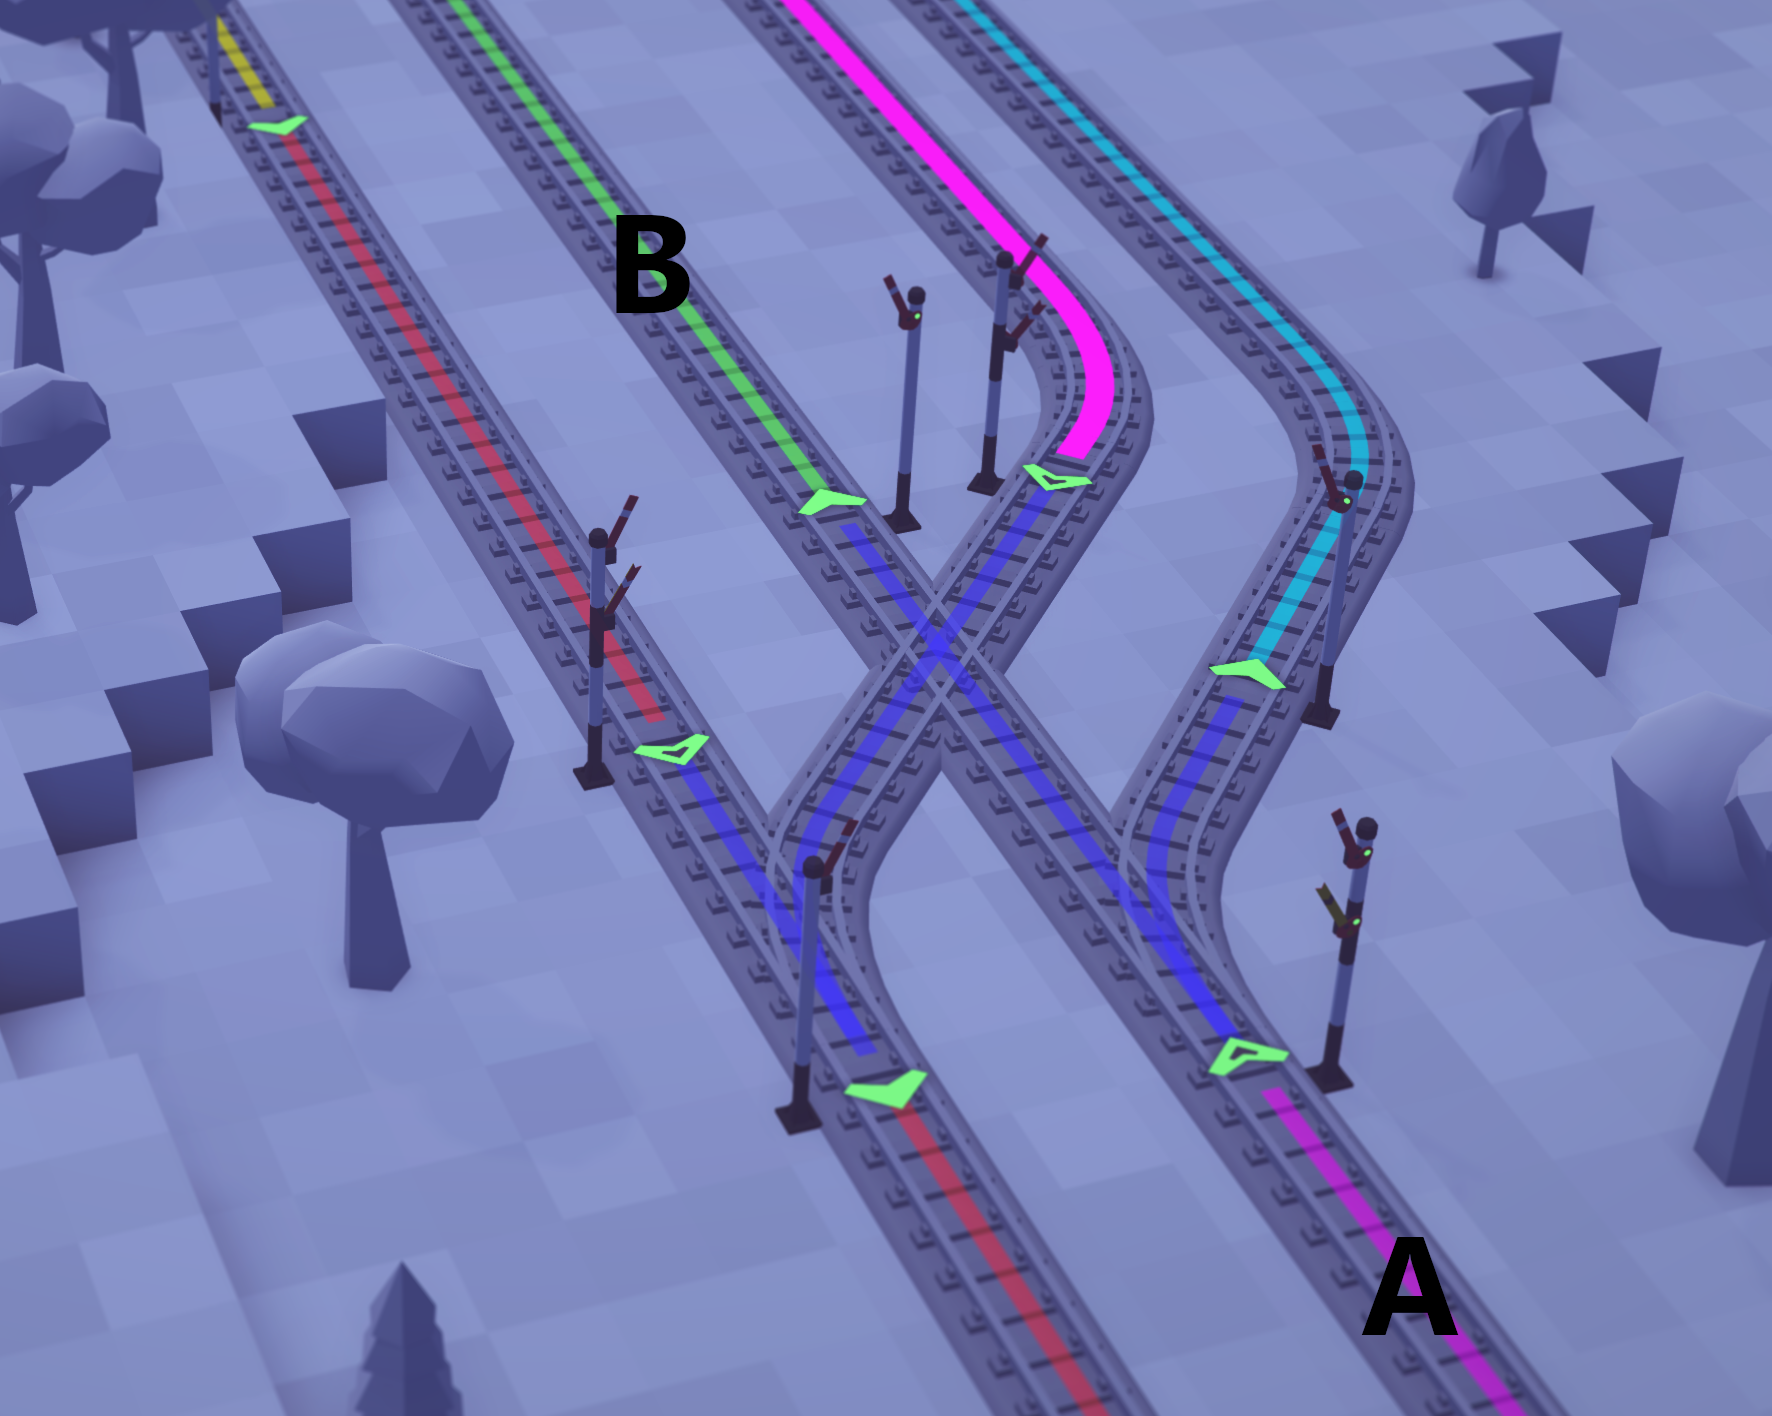
In the screenshot below, traffic coming along A will reach the pre-signal first. For it to pass through to B, it will check the signal block at B and will only pass through if that is possible.
Alternatively, imagine that the pre-signal at A was NOT a pre-signal but a standard signal. If the intersection block was open, a train would enter the intersection and then check the signal for block B. At that point, if B block was not open, the train would wait in the intersection until it was opened, hence blocking any other traffic that could pass through the intersection. This is the power of the pre-signal, checking blocks in advance before proceeding.
This is a complex topic that will be addressed in other articles, the main focus of this article is to explain the functionality of signals while trying to make it simple as possible.
Multiple Mode
| 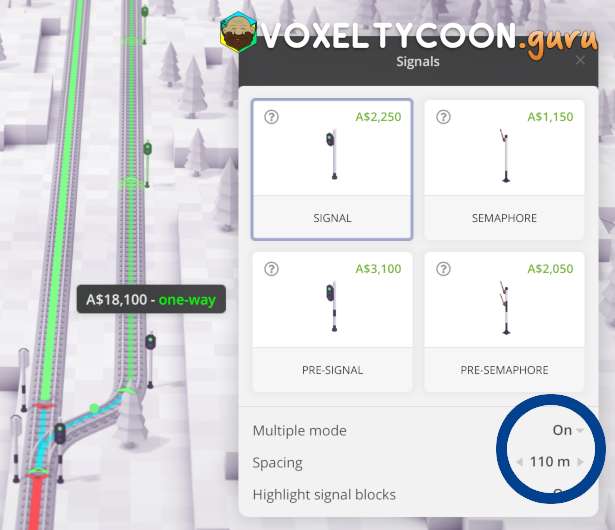 |
Block Length
When planning your track and signal distance, it is a good practice to ensure the block length can contain your entire train. If the rear end of your train overflows into the next block, that block will not be open for a train to pass through. This is most important after an intersection.
Tips
- When placing signals, pressing ALT will toggle cargo items on/off, this can make it easier to see the signal directional arrows
- If you want to measure how far a distance is on an existing track, start building another track on top of an existing track and this will tell you the distance which can help you understand where you might place the next signal