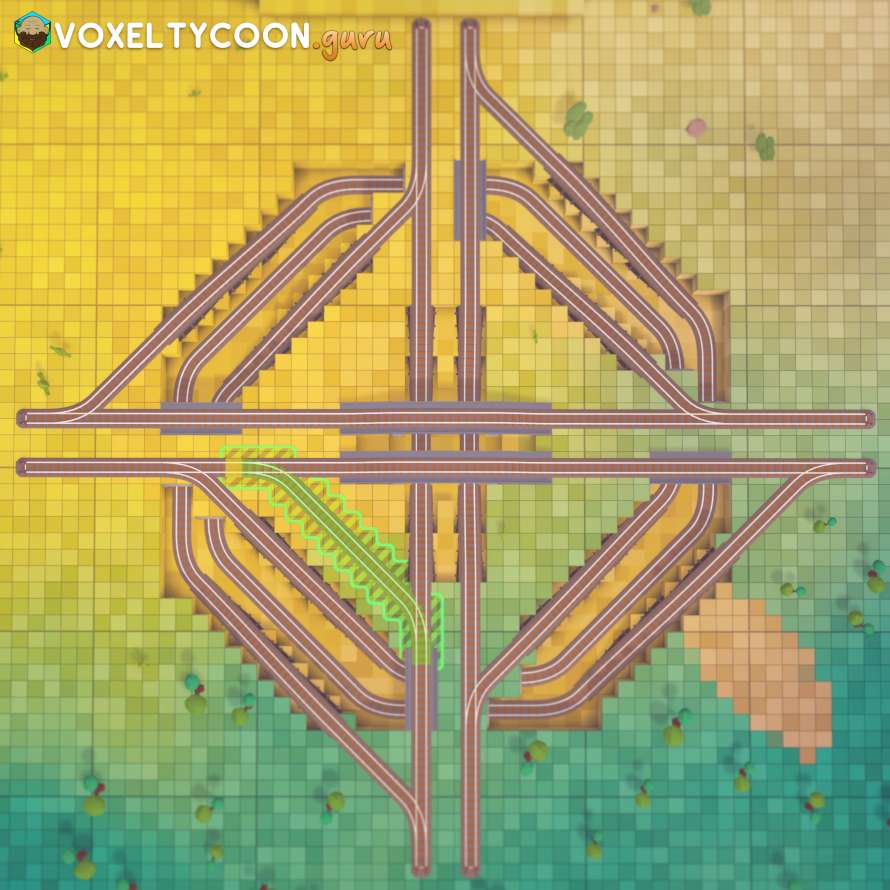
Overview
This is a 4 Way Turbine Intersection taken from https://imgur.com/a/Hcsc41w, below you will find detailed steps on how to build this intersection. This uses 50 x 50 grid from one side to the other.
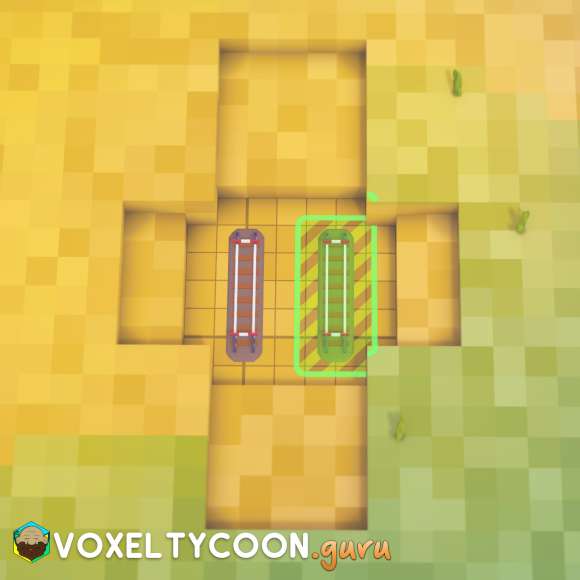
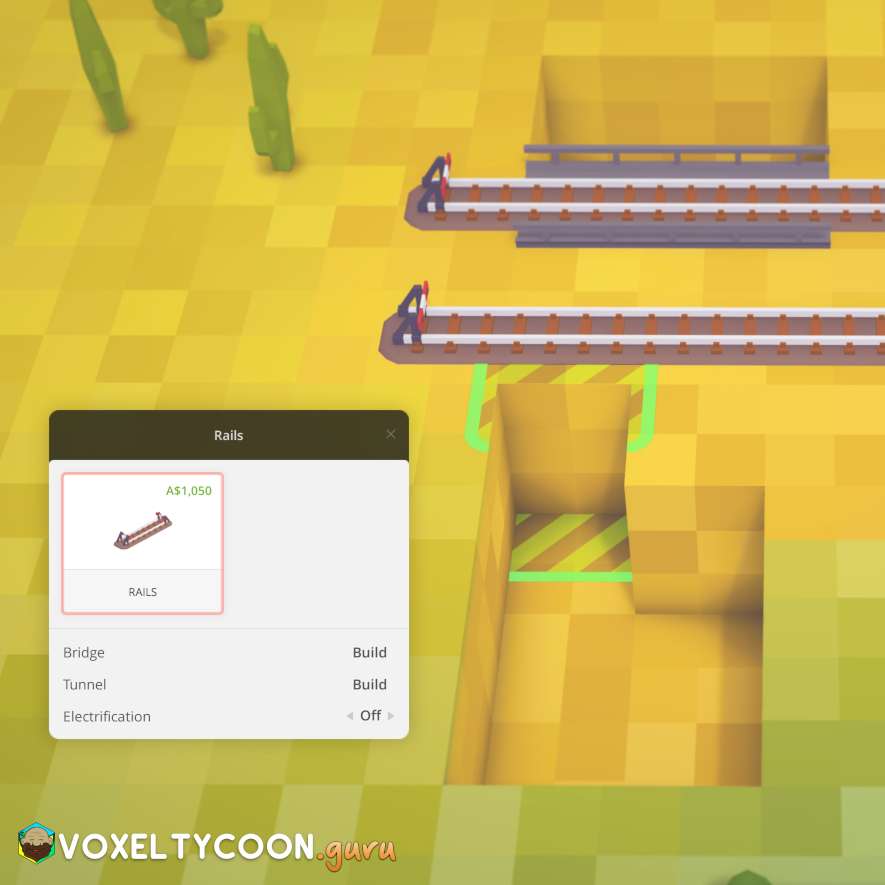
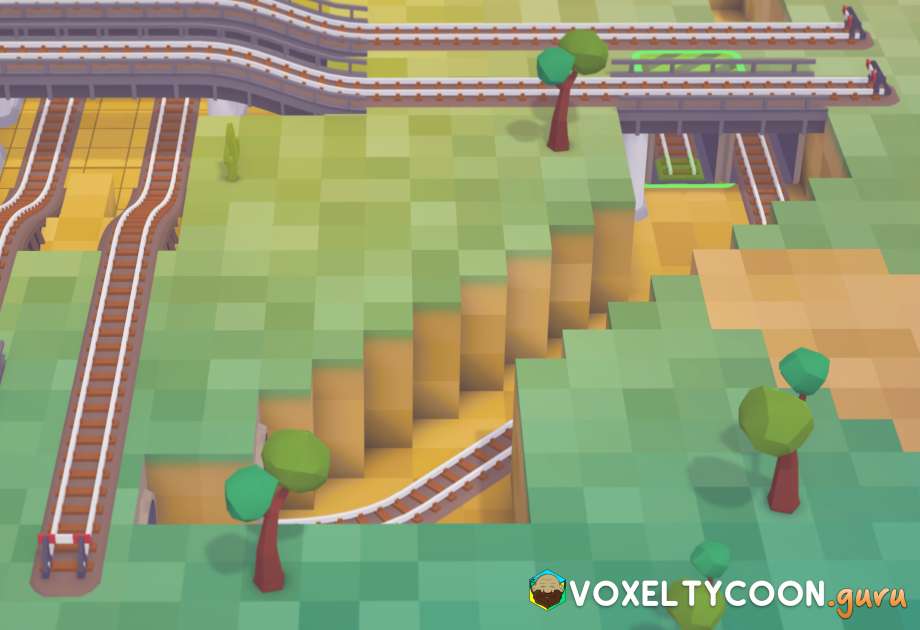
Step 1: Lower Terrain
 |
|
- In this screenshot, North-South (N-S) is the underpass and East-West (E-W) is the overpass
- Lower the terrain by 2 and make a 5x5 hole
- Extend the 5x5 1 more in each direction
- You now have a 7x7 with indented corners
- E-W
- On the next level up extend out a 2x5 hole
- Do this on both sides
- N-S
- On the next level up extend out a 5x5 hole
- Do this on both sides
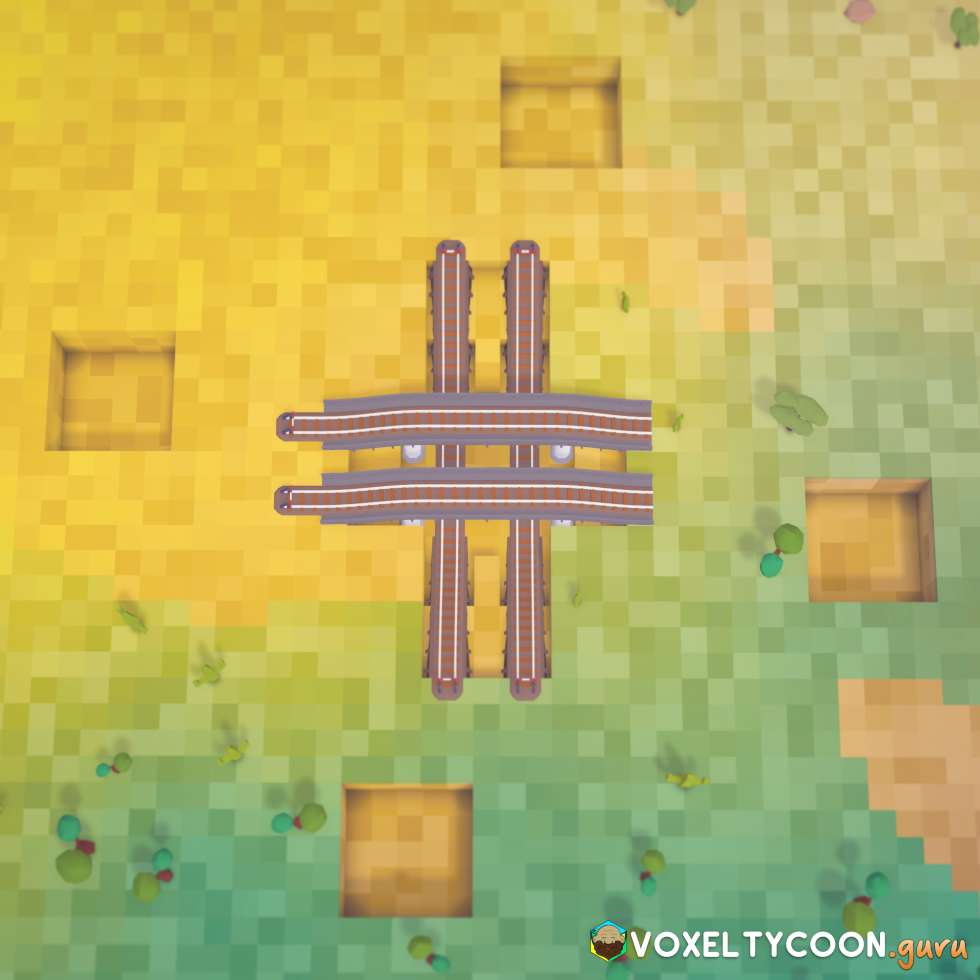
- Lay two short rail sections
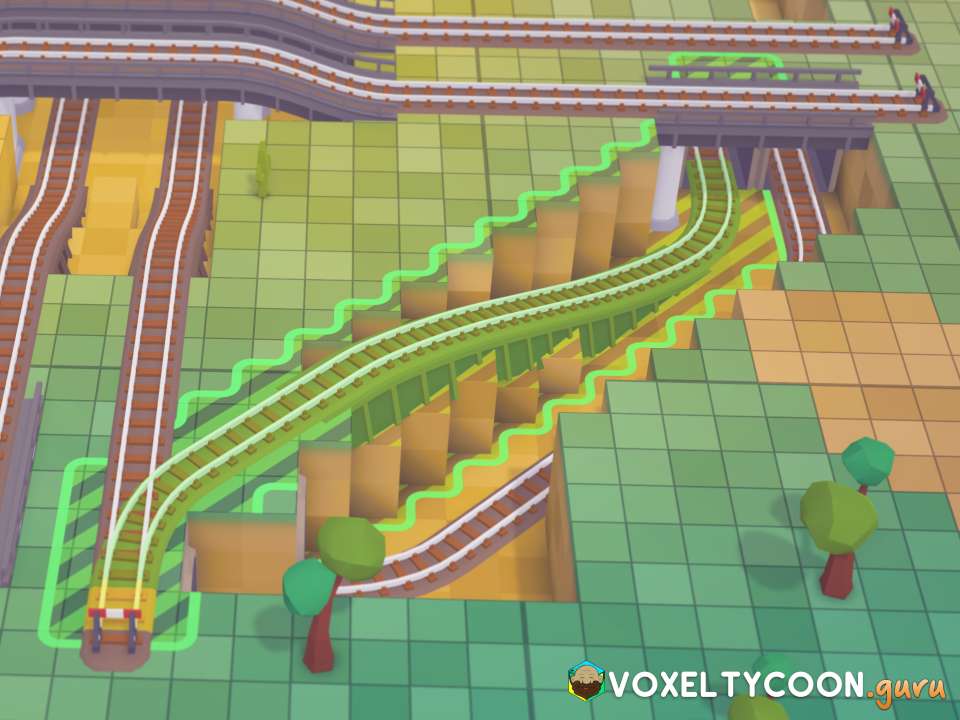
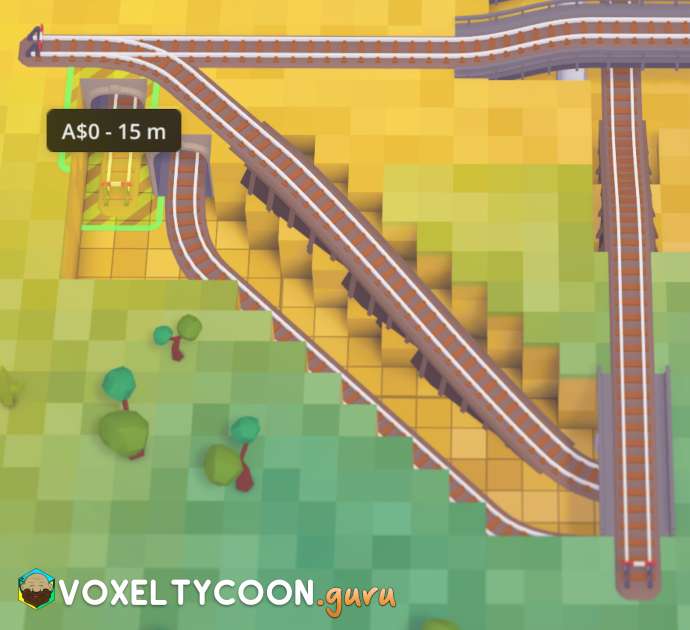
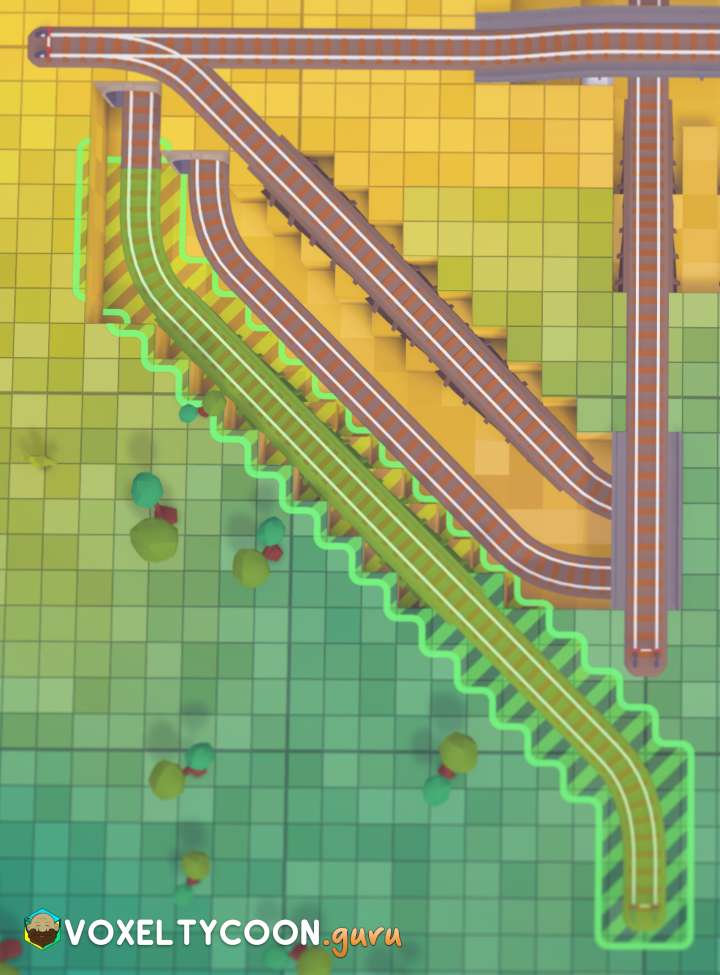
Step 2: Place Rail Ramps
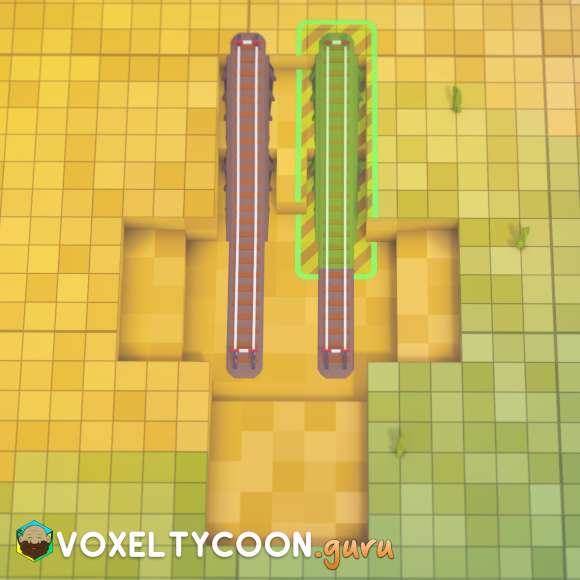
- N-S
- Starting from the bottom rail section connect the rail to the top ground level
- Repeat on both sides
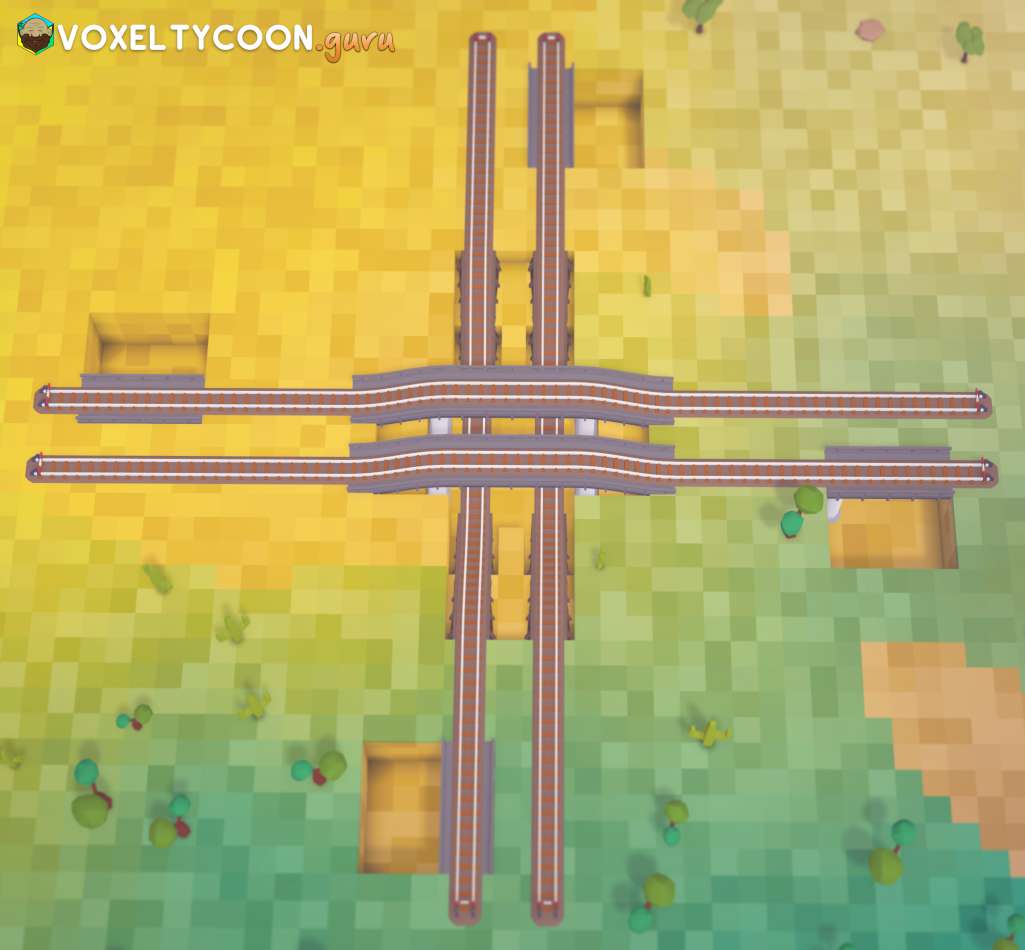
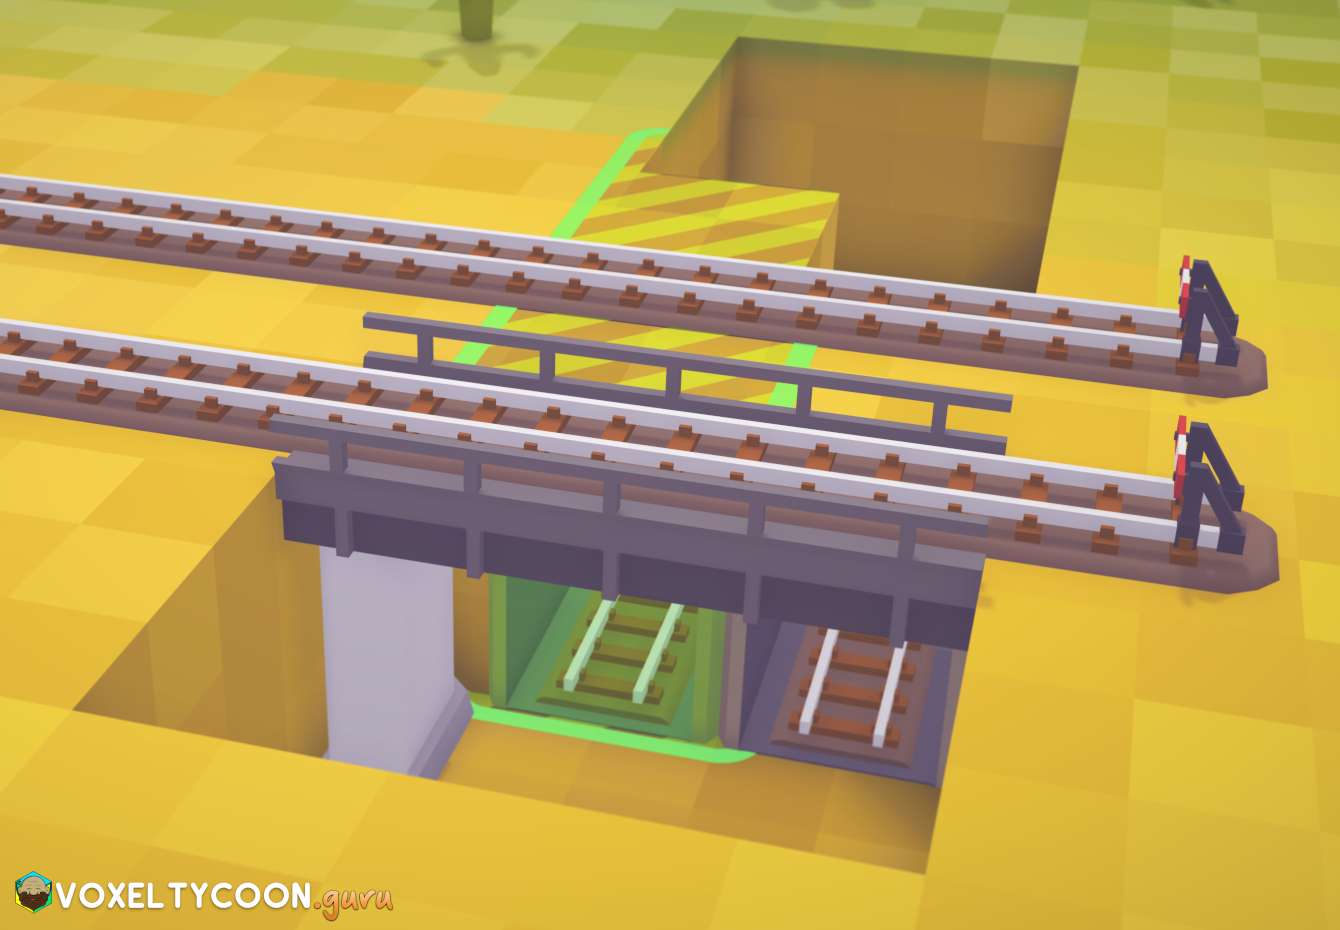
Step 3: Place Overpass Bridge
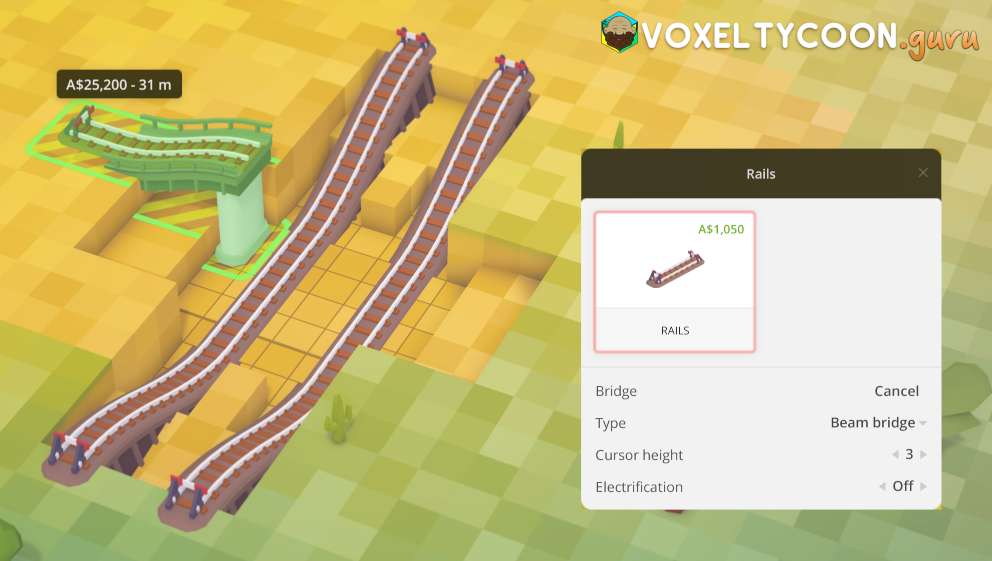
- W-E
- To add the bridge, start with a rail section on the top ground level
- Press B to change to Bridge mode
- Change the Type to Beam bridge
- When your cursor goes over the gap the first pillar appears the bridge will raise in height
- Click mouse button to create the first bridge section
- Move to the other side to create the second bridge section
- Repeat for the other bridge
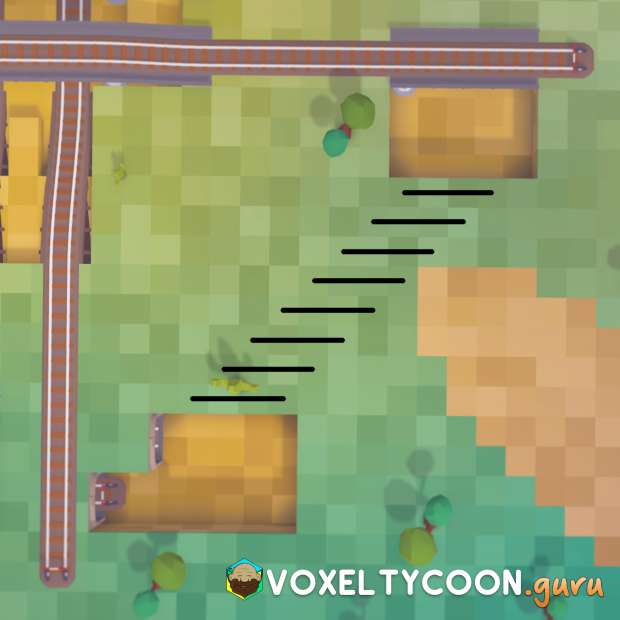
Step 4: Lower Terrain
- E-W
- From the new lower bridge section on the right go E 7 and then lower terrain down 3
- Level the terrain in the E direction to a 5x5 square
- Repeat on the W side for the upper bridge section
- N-S
- From N right rail go N 5 and then lower terrain down 3
- Level the terrain in the E direction to a 5x5 square
- Repeat on the S left rail
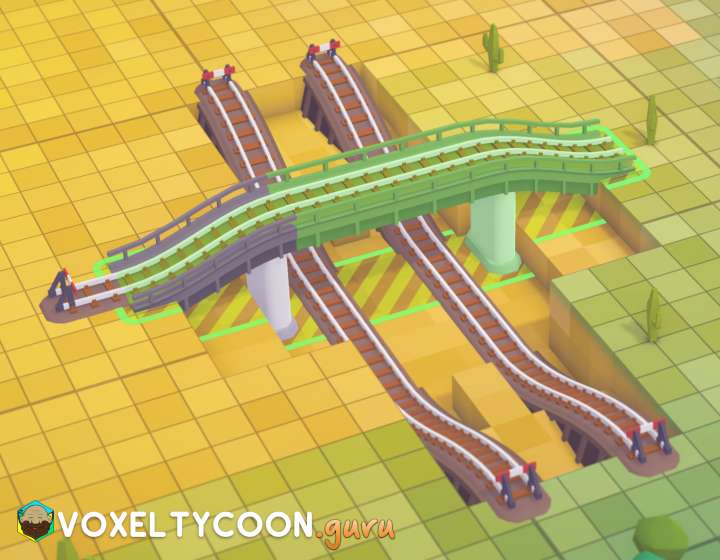
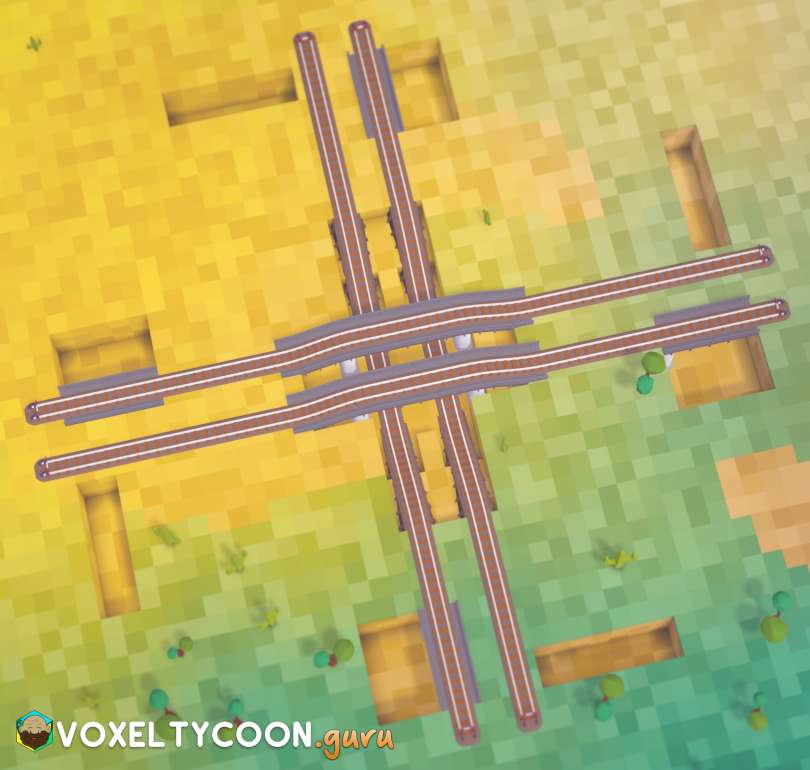
Step 5: Place Outer Bridge

- W-E
- On the top right side of the W 5x5 start with a rail section on the top ground level heading towards the existing bridge
- Press B to change to Bridge mode
- Change the Type to Beam bridge
- When it reaches the other side it will place a beam support and a flat bridge will be created when you click
- Create the bride and then connect the track through to the next bridge
- At the same time, continue the rail out parallel to the other bridge
- Repeat this process all the way around, it is IMPORTANT that the beam is created on the inside section of the 5x5
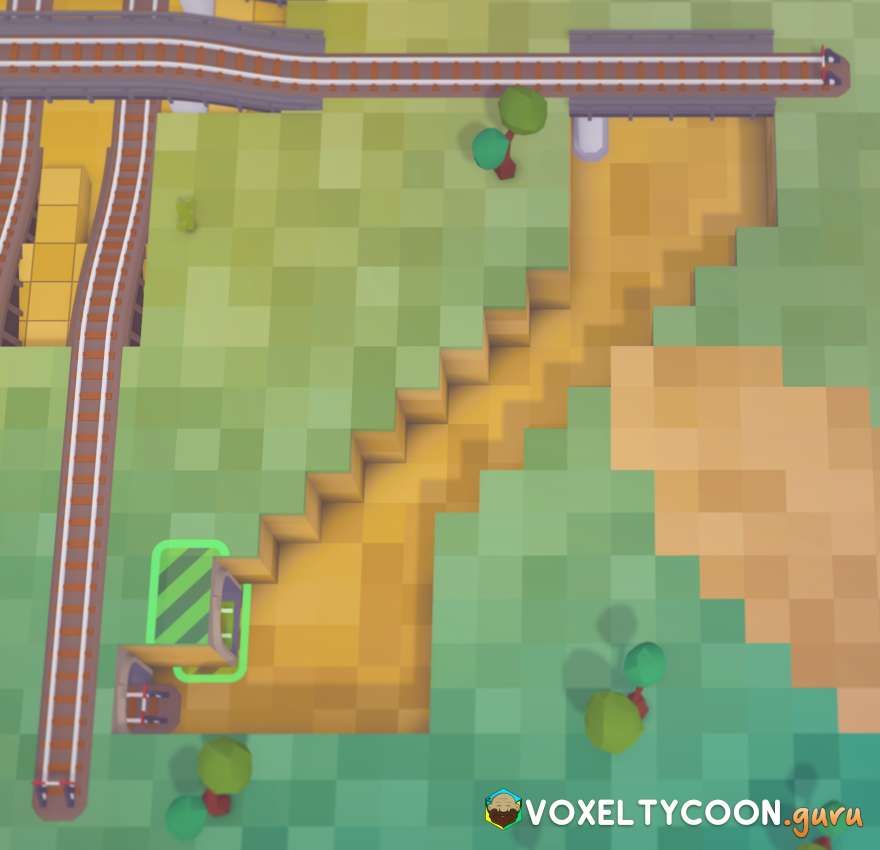
Step 6: Lower Terrain
- E
- On the N side of the bridge on the other side of the rail lower terrain by 3
- Level terrain in the N direction in a 2x7 rectangle
- Repeat all the way around
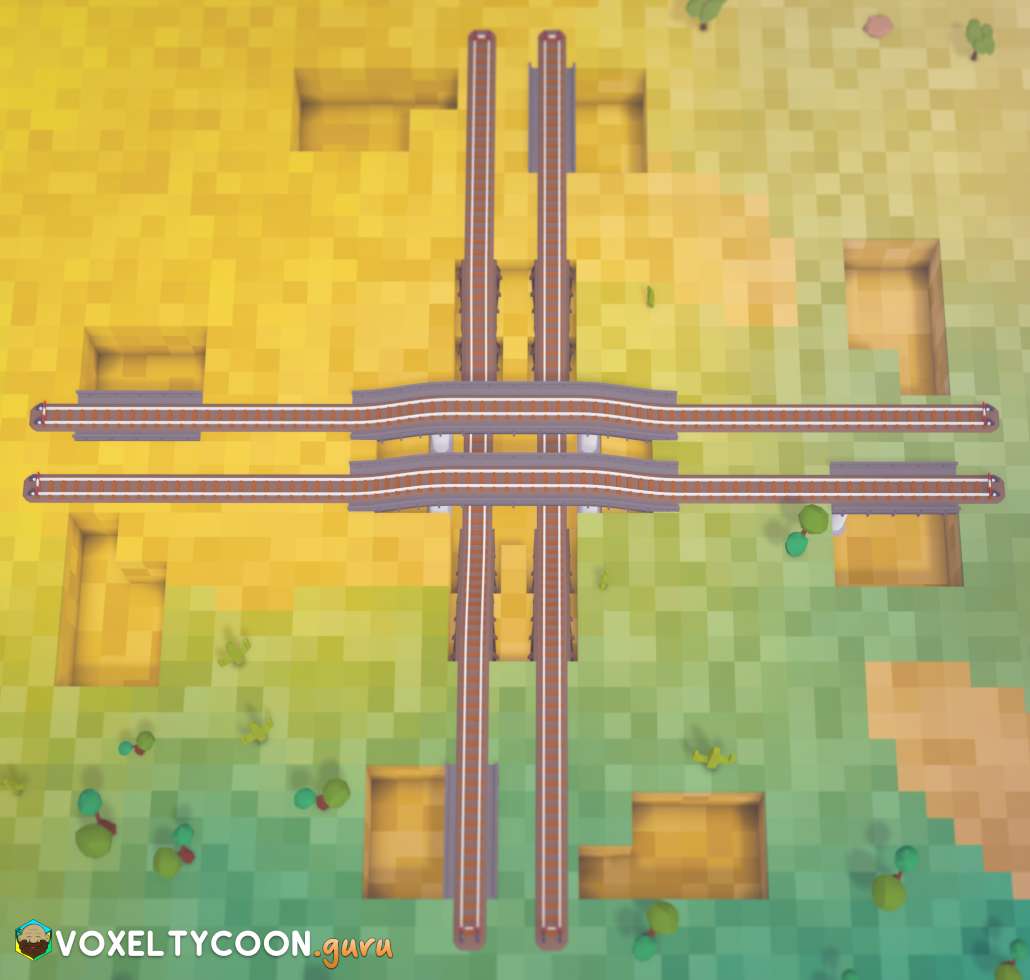
- E
- Continue the hole towards W 2x5, leaving a 2x2 square near the track end
- Repeat all the way around
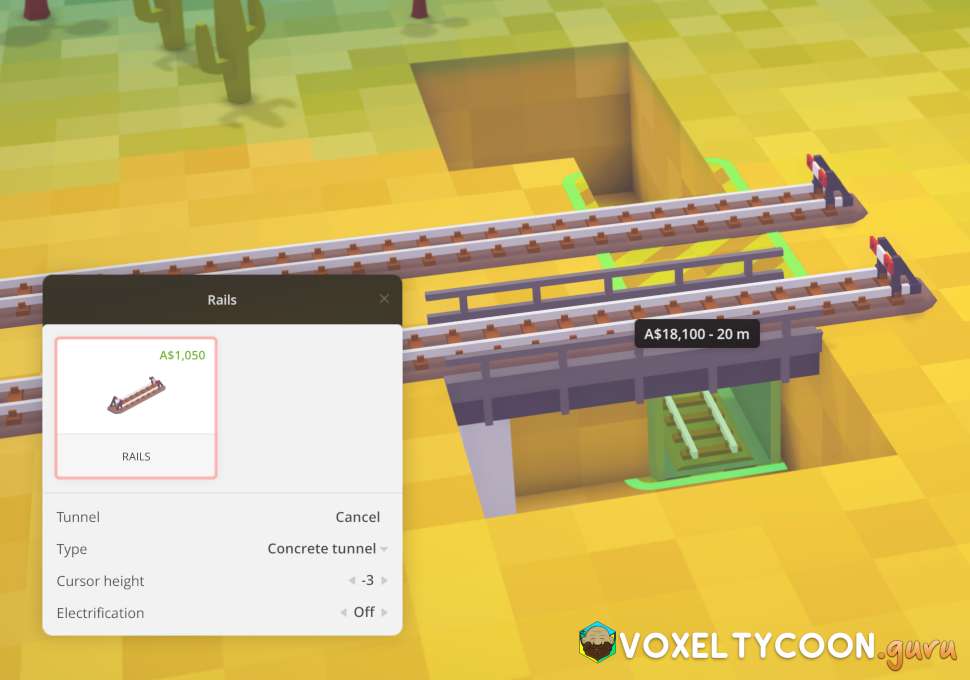
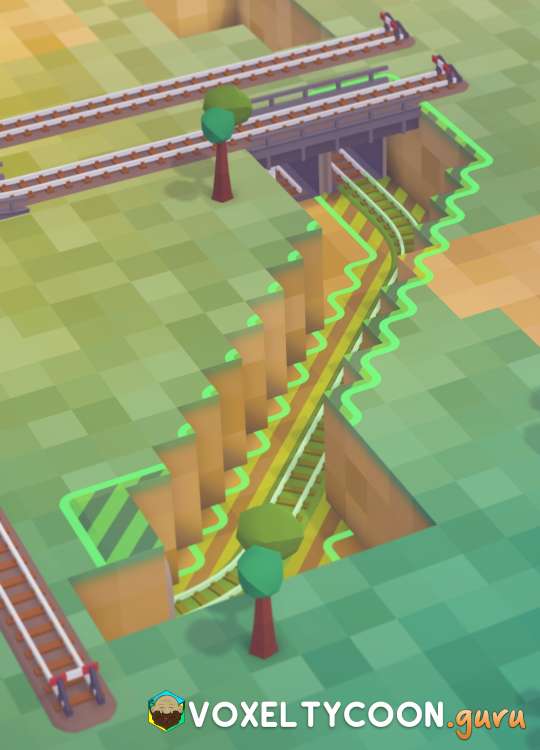
Step 7: Create Tunnels
- W
- Starting in the outside 2x7 hole
- Begin by laying a rail, click when the rail is half into the N side of the wall
- Press T to change the type to Tunnel
- Rotate the camera 180° (hold mouse scroll wheel button)
- When you position the rail in the correct spot, the tunnel will appear
- Click to create it
- This creates a 2x3 tunnel
- Repeat to create a 2x5 tunnel next to it
- Repeat all the way around
- Repeat to create a 2x5 tunnel next to the 2x3 tunnel
- Repeat all the way around
Step 8: Lower Terrain
- S
- On the 2x5 tunnel delete the small section of rail at the entrance
- Level the terrain in 1x4 increments as marked on the screenshot
Step 9: Create Lower Tunnels
- S
- Place the lay rail connector on the inside of the tunnel
- Click to start the rail
- Adjust your camera view so you can see the N E tunnel
- Connect the rail to tunnel entrance
- Repeat this all the way around
Step 10: Connect Inner Tunnels
- E
- Place the lay rail connector on the inside of the left tunnel
- Click to start the rail
- Connect the rail to the rail section above the S tunnel
- Repeat all the way around
Step 11: Connect Outer Tunnels
- W
- Add a section of 15m rail to the left tunnel
- Continue the rail to the S ground level S
- Place this new section in front of the S bridge
- Connect the tracks together from the bridge to the new section
- Also extend the parallel track section
- Repeat all the way around
Step 12: Connect Inner Turns
- The last rail sections to add are the inner turns
- Starting from the S bridge connect rail to the W rail
- Repeat all the way around
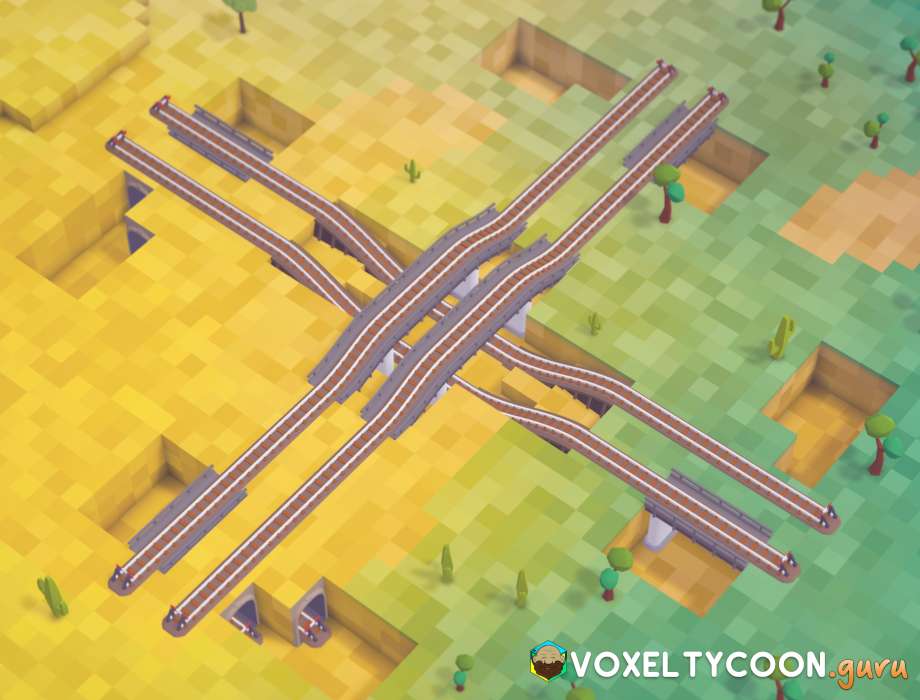
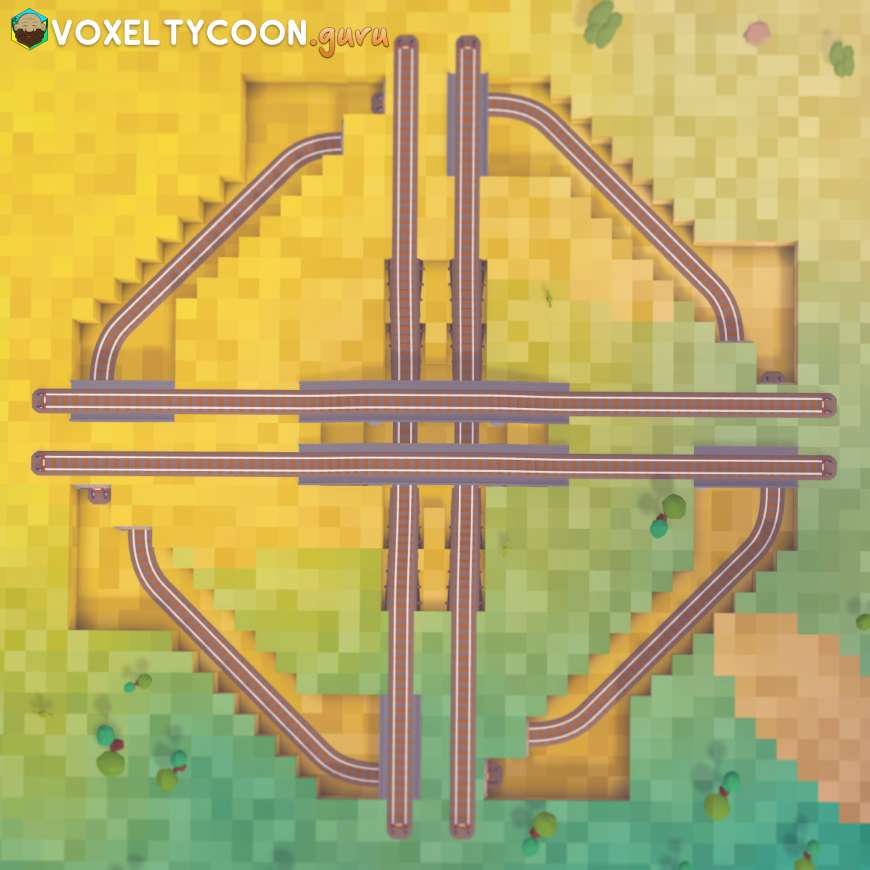
Completed Intersection
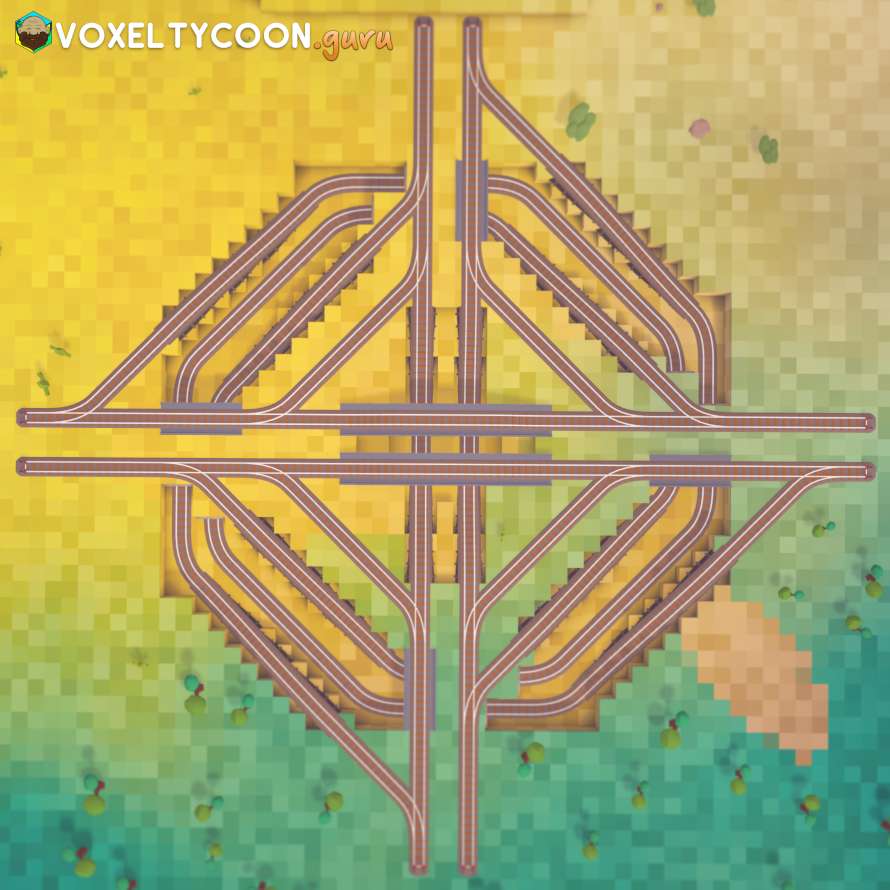
Here you can see the intersection completed.
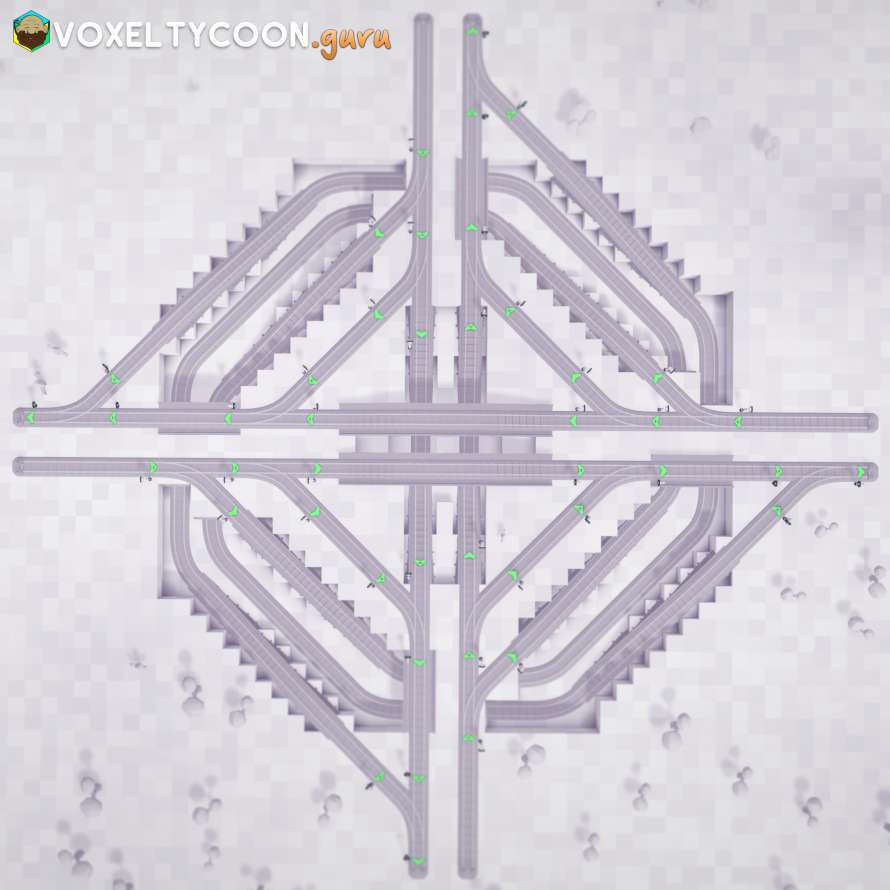
Here is after adding signals, using pre-signals before intersections and signals after intersections.